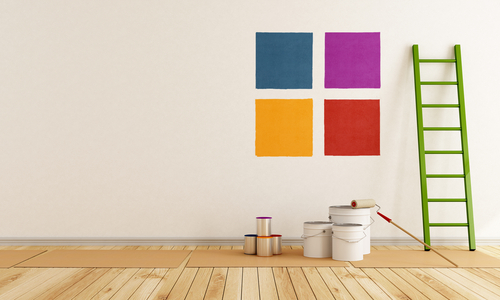
Preparation falls into various stages that might be completed in differing orders and more than once, dependant on the initial condition and type of surface requiring re-decoration. The key stages include removing old coatings, treating problem areas, cleaning, filling and sanding.
Before starting a new project, it is extremely helpful to establish exactly what type of substrate you are dealing with and what type of decoration was last applied. New coatings or wallpaper chosen will also have a bearing on the correct preparation, so it is also wise to make a selection suitable for your surface and conditions before steaming ahead. In the long run, completing these basic steps will save you time, avoid costly mistakes and leave you with a fantastic finish. (If your property was built before the 1970’s you may find that layers of old paint contain lead, in which case you would be well advised to research the latest advice before commencing any work as disturbing lead can cause health problems.)
If you need to remove or sand back old coatings it is more often a good idea to tackle this first. All shiny surfaces will generally benefit from a light key including vinyl silk emulsion. There are a variety of specialised products (including eco-friendly versions) and tools on the market to get this completed as quickly as possible including: paint & varnish remover; wallpaper stripper; wax & polish remover; rust remover; abrasive paper; blow torches; stripping knives; scrapers; wallpaper scorers; wire wool and wire brushes.
Combat common problem areas by using damp seal to seal damp patches; specific primers to block water, nicotine, rust stains and smoke damage; fungicidal wash or spray to kill and prevent re-growth of mould, algae, moss, fungus and lichen; stabilising solution to seal chalky, powdery surfaces; specific primer to seal residual wallpaper adhesive prior to painting; knotting solution to seal resinous knots; wet rot wood hardener to harden rotten wood and wood treatments and woodworm killer to eradicate any insect infestation. Whatever problem you have, take heart, as there is often a product to solve it and bring to an end, your own personal decorating nightmare!
When it comes to cleaning your surfaces, it may be quicker in the long run to do this before filling and sanding, as well as afterwards. This will enable you to identify minor defects before you have finished filling and cleaning only to discover you’ve missed a bit! Skimp on cleaning at your own peril! Dirty surfaces make it harder to apply new coatings, will reduce the adhesion of cured paint, resulting in chipping and peeling and are often the cause of a failing or botched job. Sugar soap is the industry standard way to leave a chemically clean surface ready to accept coatings, however go easy on walls previously painted with a coating that doesn’t contain vinyl, as you may take the paint off! If any bare wood or metal is involved wipe it down instead with a solvent compatible with the primer you will be using, methylated spirit or use a professional tack cloth, which will remove dirt and any residual dust. Breathable lime plaster and render requires special care and attention and depending on your chosen new finish may need to be prepared in a particular way.
There is a huge choice of fillers and sealers on the market. Some can be used inside or out, some are as light as a feather, some will stick to damp surfaces, some will stick to upvc, some are overpaintable, some fill deep holes…the list goes on. Yes, you can use a multi-purpose filler for just about everything however we would recommend that if you have a particular hole, crack or gap that is troublesome you select a filler designed especially for it. For instance, if you have a moving crack, it can be filled with a multi-purpose filler; however in a few months the crack is likely to re-appear because the filler doesn’t contain any flexible fibres which will stretch as the substrate expands and contracts. Whatever filler you decide to choose, it is always better to slightly overfill the defect and sand it back flush with the surrounding area to get the finest finish. Lastly, clean up as much dust as possible to give your coatings every chance of a silky smooth, grit-free finish.
You should now be ready to start painting!


 RSS Feed
